STEL’s 5 Tips and Tricks for Effective Prototyping
Prototyping, often the most exciting and realizing step, is arguably the most valuable phase in the product development process. Prototypes enable critical conversation and decision making, so a thoughtful prototyping process with effective prototypes makes the difference between a good product and a great one.

We sat down with the engineers at STEL to discuss their best tips and tricks to ensure a smooth and successful prototyping process. With their combined experience of what does (and doesn’t) work, this is what they recommend:
1. Ask yourself: What is my main goal for a prototype?
A prototype without an articulated purpose is just another thing cluttering up your studio. Everett Johnson explains: “there are different means to prototyping. During the first steps, you have to focus on what the model is going to target–be thoughtful on the specific questions you want answers for, and then thoughtfully answer them.”
Begin by identifying what’s more important for your prototype: looking like the final product, working like the final product, or both.
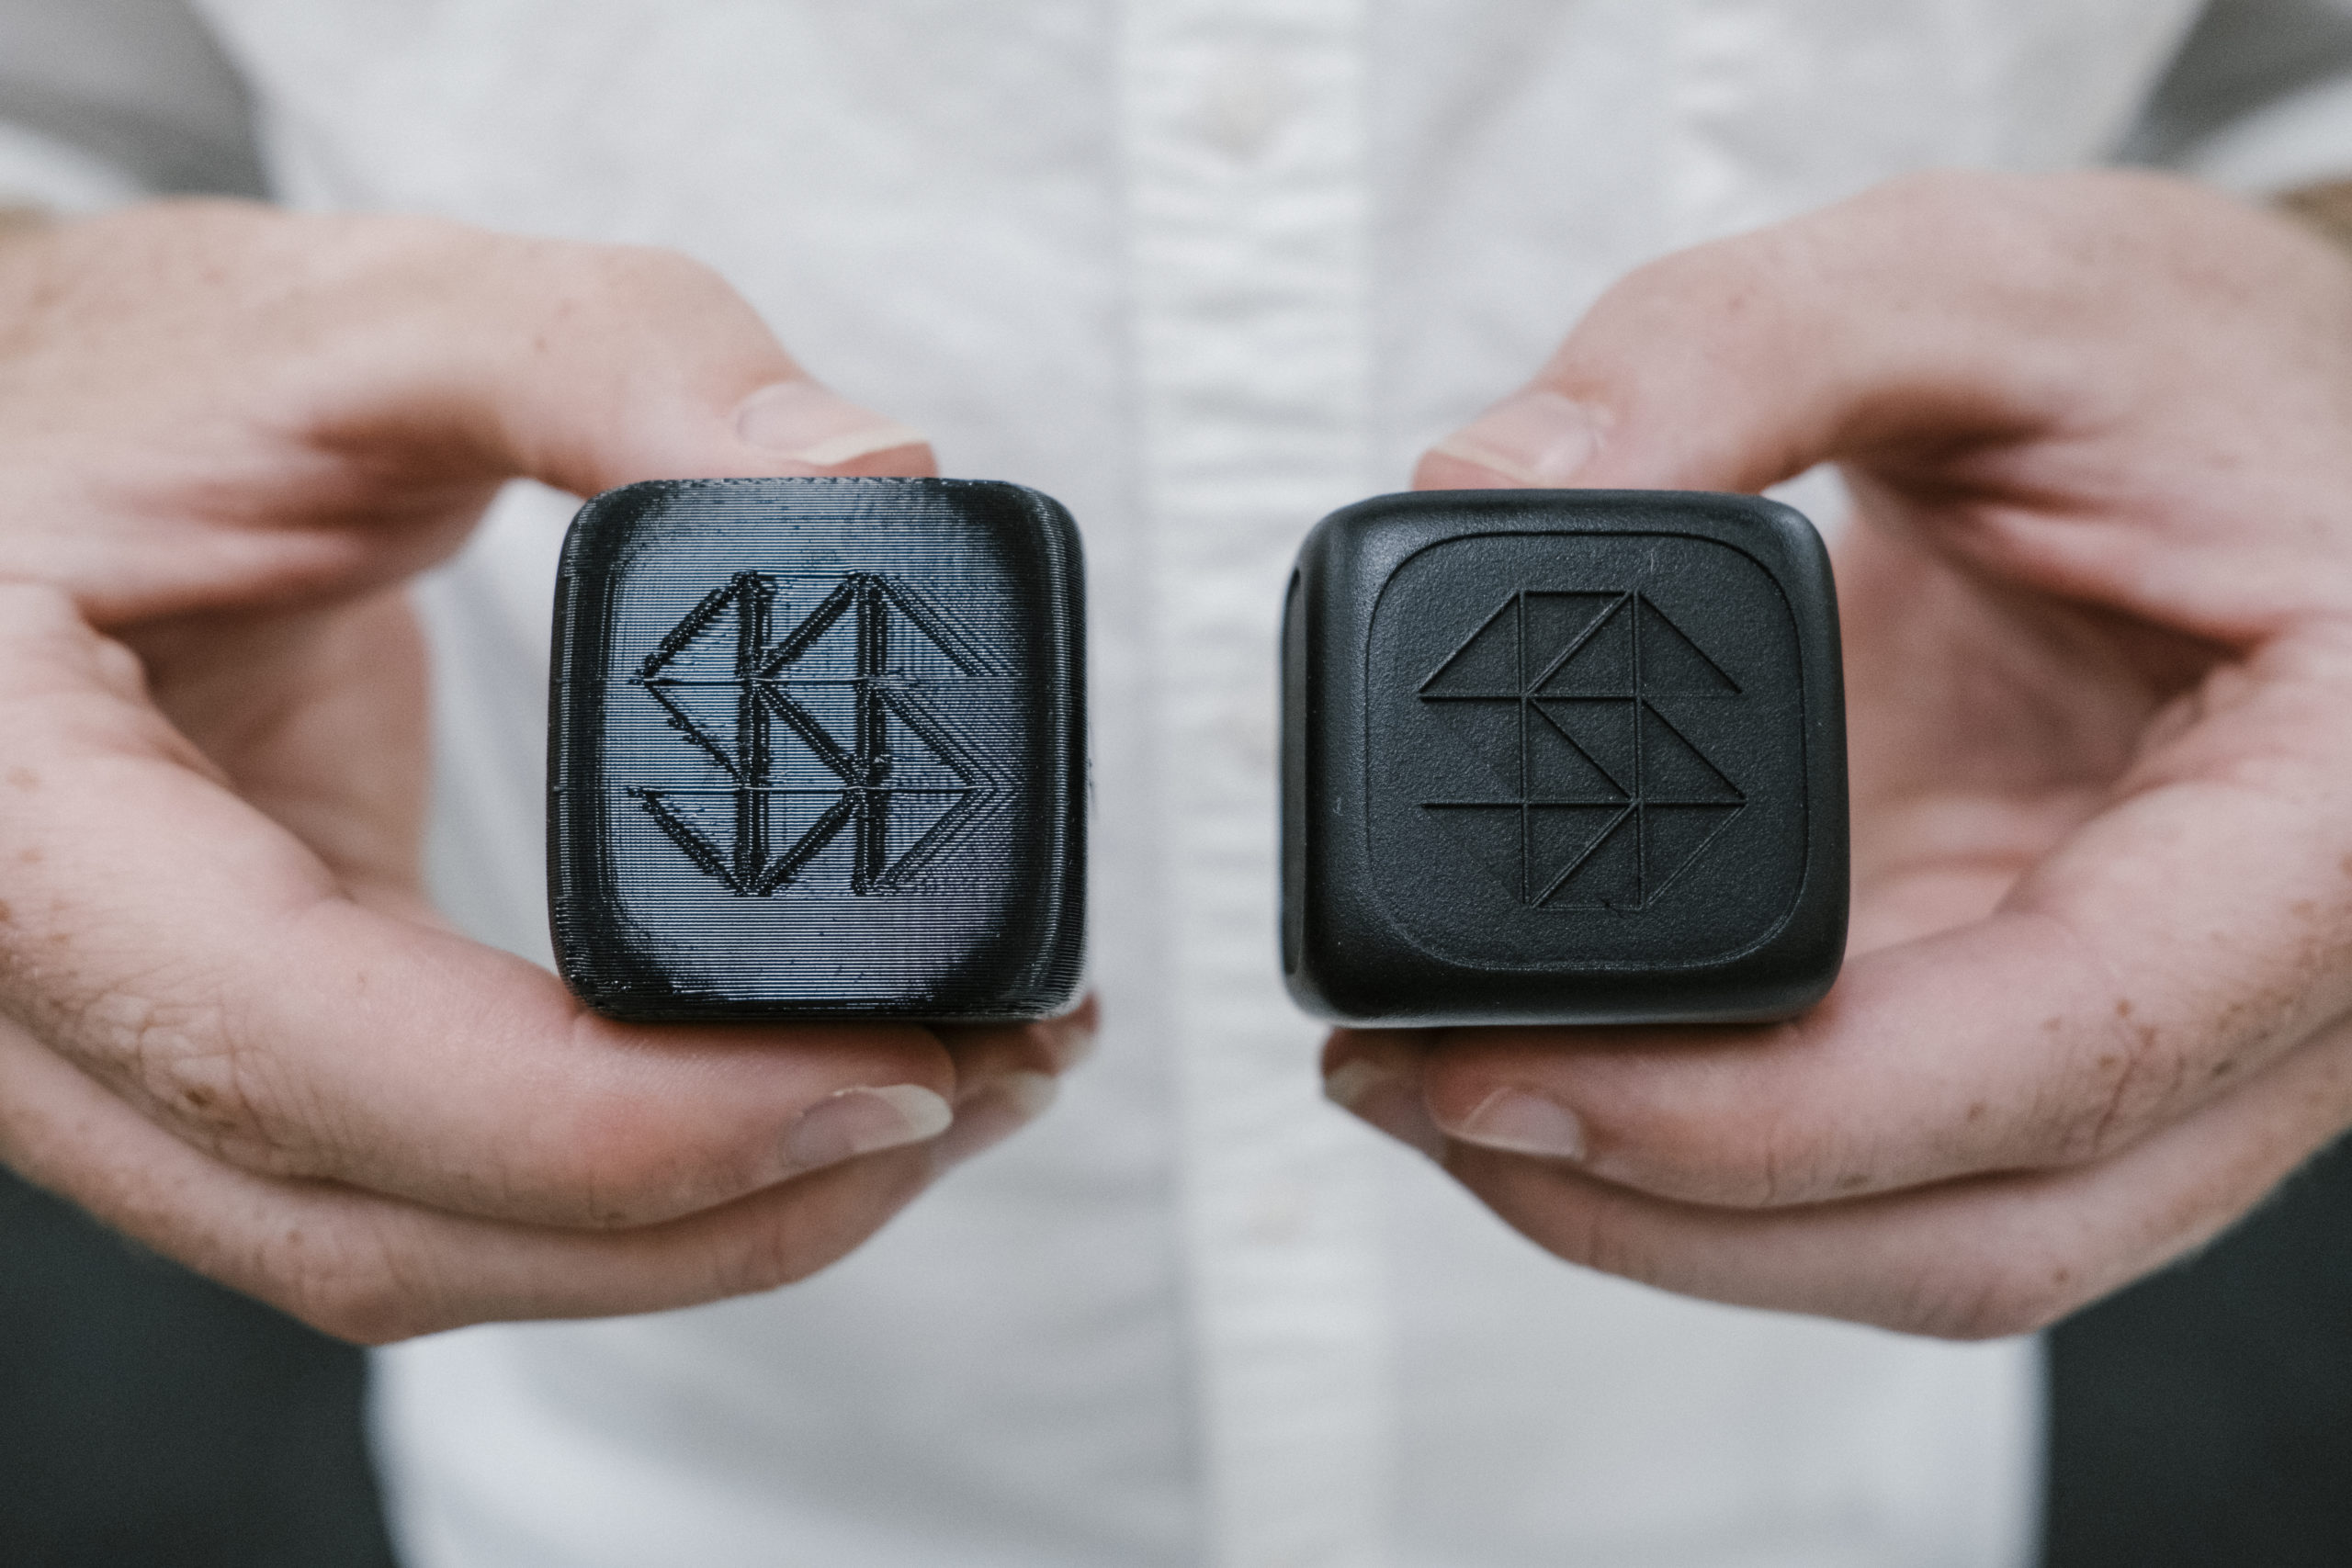
Looks-like models are created at a higher resolution with the intention of studying the overall appearance of a product, as well as the intricate details of it’s surface, edges, and textures. These models are purely aesthetically focused and serve as great tools to understand what a product will look and feel like in the user’s hand.
Works-like models are intended for functionality and mechanical testing; something that will display the strength and rigidity of a product. These prototypes might not be the most beautiful, but they definitely will give you an understanding about what works.
Mulin Yang explains: “Outside of the studio, I see people creating their prototypes with the combination of the two, and while this isn’t necessarily wrong, you might want to make sure you aren’t spending unnecessary time and money on prototyping; determine your intention to get the most out of it.”
2. The 3 F’s: Form, Fit, and Function
While articulating the ultimate goal of your prototype up front is critical to an efficient, effective prototyping process, every new prototype is an opportunity to study and improve the 3 F’s. Form, Fit, Function
Nick Wong describes why this is such an important component in his process of prototyping: “When I make my prototypes, I tend to work on them in the order of developing the form first, followed by fit, and then lastly, how it all functions. In every variation of prototype or product, they all work together, but require separate attention and studying as well.”

When considering form, think about the housing in which any of the functionality lives in. What is its shape? Its size? Do those form factors create an optimal environment for the internal components of the product? Could the form be even more optimized for user experience? Form also refers to the ergonomics of the prototype in relation to the user experience. How does it feel in your hand? Does it fit on or with your body? Is it easy to pick up and use? Both looks-like and works-like models can be used for studying the form of a product.
Fit studies focus solely on how each physical component of the prototype join with one another to create the final assembly of the product. For example, parts may need to slide against each other (a loose fit) for mobility, or be closely bonded (a tight fit) to promote strength or waterproofing. Studying fit allows you to understand how each part works together to create a whole product, and how different fits yield different features.
After studying the shape of the prototype and how it works with a human user, functionality tests a prototype’s ability to withstand the environments and situations it is intended for. Where is the product going to experience the most wear and tear? What environment will the product be used in? What material is best suited for intended environment? Will that affect how well it will work or how long it will last? Studying functionality ensures the prototype is built in the most durable way, based on the intended use and user.

3. Verification is key.
Verification is the primary goal in prototyping, but it can often be easy to lose sight of what exactly you are verifying, especially when asking a variety of questions and studying a variety of factors.
“Prototyping allows you to validate concepts and design direction in a very direct and effective manner, especially when looking for certain answers,” Director of Engineering, Jared Naito states. “This allows you to reduce development timelines because you’re able to identify shortcomings through verification and pivot early on.”
4. Give yourself options.
Test a variety of materials, processes, geometries, etc. to ensure that the fit, form, and function are as optimized for the product’s ultimate goal as possible. Prototyping several options can help us down-select which initial product requirements are most crucial for a complete, final design. Prototyping is inherently a process revolving around options, so intentional experimentation is critical.

5. Consider 3D Printing for your prototyping go-to.
The technology surrounding 3D printing has evolved exponentially in recent years. With the accessibility that now exists with 3D printing, the prototyping stage for products has become more cost and time efficient than ever before, allowing for more rapid and accurate verification.

—
While there are hundreds of other tips and tricks for successful prototyping, these are the five we live by in the STEL studio. Looking for more prototyping best practices? Our engineers check these resources to stay in the know:
No matter what you’re prototyping, remember it will only be a prototype, not the final product. It’s purpose isn’t to be perfect. Ryan–COO of STEL–explains, “It’s called prototyping for a reason, don’t expect a production level part right away. Prototyping is the phase that enables a production level part without a hitch.”
Want to get your own prototype started? Let’s get going. Visit STEL 3D Labs to start the prototyping process, or reach out to our full design team.